
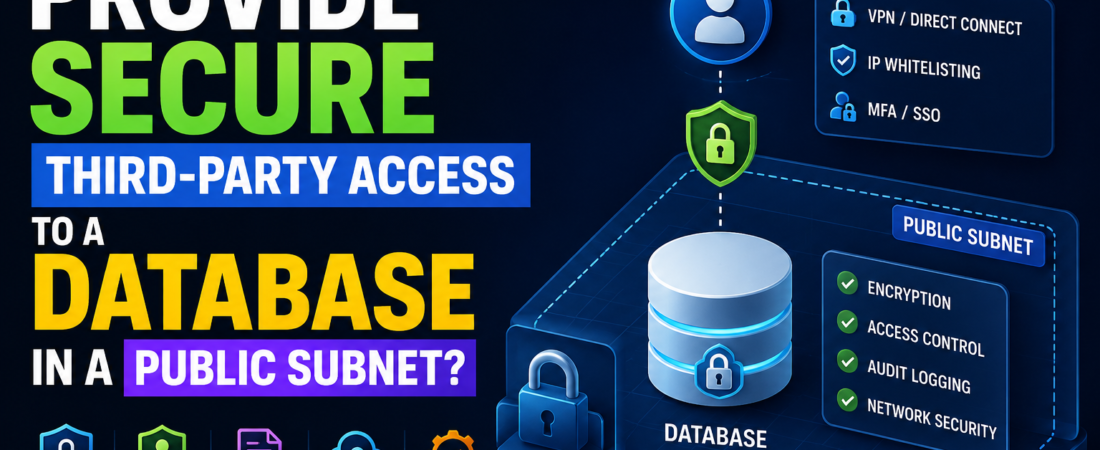
Five approaches ranked from simplest to most secure — with architecture diagrams and real-world guidance.
Introduction
A common scenario: your database holds data that a third-party partner needs to access — a payment processor, an analytics vendor, a B2B integration partner. The question isn’t just “how do I connect them?” but “how do I connect them securely?”
Before anything else, let me state the most important point:
Best practice: your database should NOT be in a public subnet. Move it to a private subnet and use one of the methods below to give the third party secure access. If it’s currently public-facing, that’s the first thing to fix.
In this post, I’ll walk through five approaches — from the simplest (IP whitelisting) to the most secure (AWS PrivateLink) — with the trade-offs of each.
The Five Options at a Glance
| # | Method | Internet Exposure | Complexity | Security Level | Best For |
|---|---|---|---|---|---|
| 1 | Security Group IP Whitelist | Yes (over internet) | Low | Basic | Quick setup, static IP partner |
| 2 | Site-to-Site VPN | No (encrypted tunnel) | Medium | High | Partners with own data centre |
| 3 | AWS PrivateLink + NLB + RDS Proxy | No (AWS backbone) | High | Highest | Cross-account, zero internet |
| 4 | Direct Connect | No (private fibre) | High | Highest | Large enterprise, high bandwidth |
| 5 | Cross-Account IAM Role + RDS IAM Auth | Depends on setup | Medium | High | Partner already on AWS |
Option 1: Security Group IP Whitelist (Simplest)
“Allow the third party’s specific IP address to reach the database port. Block everything else.”
How It Works
Third Party (Static IP: 203.0.113.50)
        │
        │ Internet (TLS encrypted)
        ▼
Security Group Rule:
  Inbound: TCP 5432 from 203.0.113.50/32 → ALLOW
  Everything else → DENY (implicit)
        │
        ▼
RDS Database (port 5432)
Implementation
resource "aws_security_group_rule" "third_party_access" {
  type              = "ingress"
  from_port         = 5432
  to_port           = 5432
  protocol          = "tcp"
  cidr_blocks       = ["203.0.113.50/32"]   # Partner's STATIC IP only
  security_group_id = aws_security_group.database.id
  description       = "Partner XYZ - DB read access (approved: 2026-07-01)"
}
What You Must Also Do
- Enforce TLS on the database connection (
rds.force_ssl = 1) - Create a dedicated database user with read-only access to specific tables only
- Never use
0.0.0.0/0— always a specific IP or CIDR - Set an expiry/review date — revisit the rule quarterly
Pros and Cons
| Pros | Cons |
|---|---|
| Simple to implement (5 minutes) | Traffic crosses the public internet |
| No infrastructure to manage | Partner’s IP might change (breaks access) |
| Works immediately | Database must have public endpoint (or NAT route) |
| No deep packet inspection | |
| Can’t control what the partner does once connected |
When to Use
- Quick proof-of-concept or temporary integration
- Partner has a static, known IP
- Low-sensitivity data (not PII or payment data)
Option 2: Site-to-Site VPN (Encrypted Private Tunnel)
“Create an IPsec VPN tunnel between the partner’s network and your AWS VPC. Traffic never touches the public internet.”
How It Works
Third Party Data Centre                    Your AWS VPC
┌──────────────────────┐                  ┌──────────────────────┐
│                      │                  │                      │
│  Partner App ────────┼── IPsec VPN ────►│─── RDS Database     │
│                      │   (encrypted)    │    (private subnet)  │
│  Customer Gateway    │                  │    VPN Gateway       │
│  (their firewall)    │                  │                      │
└──────────────────────┘                  └──────────────────────┘
Implementation Steps
- Create a Virtual Private Gateway (VGW) and attach to your VPC
- Create a Customer Gateway pointing to the partner’s public IP
- Create a VPN Connection between VGW and Customer Gateway (AWS provides config)
- Share the VPN configuration with the partner (IKE settings, pre-shared keys)
- Update route tables to route partner’s CIDR through the VPN
- Add security group rule allowing the partner’s private IP range on port 5432
resource "aws_vpn_connection" "partner" {
  vpn_gateway_id      = aws_vpn_gateway.main.id
  customer_gateway_id = aws_customer_gateway.partner.id
  type                = "ipsec.1"
  static_routes_only  = false   # Use BGP for dynamic routing

  tags = { Name = "partner-xyz-vpn" }
}

resource "aws_customer_gateway" "partner" {
  bgp_asn    = 65000
  ip_address = "198.51.100.1"   # Partner's public IP (their VPN device)
  type       = "ipsec.1"

  tags = { Name = "partner-xyz-cgw" }
}
Pros and Cons
| Pros | Cons |
|---|---|
| Traffic never touches public internet | Partner needs VPN-capable hardware/software |
| Encrypted by default (IPsec) | Setup takes coordination (both sides configure) |
| Private IP communication | Throughput limited to 1.25 Gbps per tunnel |
| Database stays in private subnet | Ongoing maintenance (tunnel flapping, DPD settings) |
| Familiar to enterprise network teams | Cost: ~$36/month per VPN connection |
When to Use
- Partner has their own data centre or office network
- You need private, encrypted connectivity
- Medium to long-term integration
- Regulatory requirement for no public internet exposure
Option 3: AWS PrivateLink + NLB + RDS Proxy (Most Secure — Recommended)
“Traffic stays entirely on AWS’s private backbone. Never touches the internet. Works even if IP ranges overlap between accounts.”
How It Works
Partner's AWS Account                     Your AWS Account
┌──────────────────────────┐             ┌──────────────────────────┐
│                          │             │                          │
│  Partner App             │             │  RDS Database            │
│       │                  │             │       ▲                  │
│       ▼                  │             │       │                  │
│  VPC Interface Endpoint  │             │  RDS Proxy               │
│  (PrivateLink consumer)  │─── AWS ────►│       ▲                  │
│                          │  backbone   │       │                  │
│  Private IP in their VPC │  (no internet)│  Network Load Balancer │
│                          │             │       ▲                  │
│                          │             │       │                  │
│                          │             │  VPC Endpoint Service    │
│                          │             │  (PrivateLink provider)  │
└──────────────────────────┘             └──────────────────────────┘
Implementation Steps
In YOUR account (provider side):
- Set up RDS Proxy in front of your database (stable endpoints, connection pooling)
- Create a Network Load Balancer (NLB) pointing to the RDS Proxy
- Create a VPC Endpoint Service pointing to the NLB
- Accept the partner’s connection request (or auto-accept from allowed accounts)
# NLB targeting RDS Proxy
resource "aws_lb" "rds_proxy_nlb" {
  name               = "partner-db-access"
  internal           = true
  load_balancer_type = "network"
  subnets            = var.private_subnet_ids
}

resource "aws_lb_target_group" "rds_proxy" {
  name        = "rds-proxy-tg"
  port        = 5432
  protocol    = "TCP"
  target_type = "ip"
  vpc_id      = var.vpc_id
}

# VPC Endpoint Service (PrivateLink provider)
resource "aws_vpc_endpoint_service" "database" {
  acceptance_required        = true   # Manually approve connections
  network_load_balancer_arns = [aws_lb.rds_proxy_nlb.arn]

  allowed_principals = [
    "arn:aws:iam::PARTNER_ACCOUNT_ID:root"
  ]
}
In the PARTNER’s account (consumer side):
# They create an Interface Endpoint in their VPC
resource "aws_vpc_endpoint" "partner_db_access" {
  vpc_id              = var.partner_vpc_id
  service_name        = "com.amazonaws.vpce.eu-central-1.vpce-svc-YOUR_SERVICE_ID"
  vpc_endpoint_type   = "Interface"
  subnet_ids          = var.partner_private_subnets
  security_group_ids  = [var.partner_sg_id]
  private_dns_enabled = false
}
Why This Is the Best Option
| Benefit | Explanation |
|---|---|
| Zero internet exposure | Traffic flows on AWS backbone, never public |
| Works with overlapping CIDRs | Your VPC and partner’s VPC can use the same IP range (10.0.0.0/16) — PrivateLink handles it |
| Provider controls access | You approve/reject endpoint connections. You can revoke at any time |
| Private IP in partner’s VPC | The endpoint gets a private IP in the partner’s network — feels local to them |
| No firewall/VPN configuration | No hardware, no IPsec settings, no tunnel maintenance |
| Scales infinitely | No bandwidth limits like VPN tunnels |
Pros and Cons
| Pros | Cons |
|---|---|
| Highest security (no internet) | More complex setup (NLB + RDS Proxy + Endpoint Service) |
| Works cross-account and cross-region | Cost: NLB (~$16/month) + data processing |
| No IP overlap issues | Partner must also be on AWS |
| You control who connects | Initial setup requires coordination |
| RDS Proxy adds connection pooling benefit |
When to Use
- This is the recommended approach for any production cross-account database access
- Partner is on AWS (or can deploy a component on AWS)
- Sensitive data (PII, payments, healthcare)
- Compliance requirements (no internet exposure)
- Long-term integration
Option 4: AWS Direct Connect (Dedicated Private Fibre)
“A physical private fibre connection from the partner’s data centre to AWS. Maximum bandwidth, minimum latency, zero internet.”
How It Works
Partner Data Centre ──── Physical Fibre ────► AWS Direct Connect Location ────► Your VPC
                     (dedicated, private)         (colocation facility)
When to Use
- Very large data volumes (50+ GB/day)
- Need consistent low latency (not best-effort like internet)
- Long-term partnership (setup takes weeks/months)
- Enterprise partners with colocation presence
Cost
- Dedicated connection: $0.30/hr (1 Gbps) = ~$220/month + data transfer
- Hosted connection: available from partners at lower commitment
Pros and Cons
| Pros | Cons |
|---|---|
| Highest bandwidth (up to 100 Gbps) | Expensive setup and monthly cost |
| Consistent latency (not internet-variable) | Takes weeks to provision (physical) |
| Private (no internet) | Requires colocation facility access |
| Can layer VPN on top for encryption | Overkill for most integrations |
Option 5: Cross-Account IAM Role + RDS IAM Authentication
“The partner assumes an IAM role in your account and uses temporary credentials to authenticate to the database. No long-lived passwords exchanged.”
How It Works
Partner's AWS Account                     Your AWS Account
┌──────────────────────┐                 ┌──────────────────────┐
│                      │                 │                      │
│  Partner App         │                 │  IAM Role            │
│       │              │  AssumeRole     │  (cross-account)     │
│       ▼              │────────────────►│       │              │
│  STS:AssumeRole      │                 │       ▼              │
│  (with external ID)  │                 │  RDS IAM Auth Token  │
│                      │                 │       │              │
│                      │                 │       ▼              │
│                      │                 │  RDS Database        │
└──────────────────────┘                 └──────────────────────┘
Implementation
In YOUR account — create a cross-account role:
resource "aws_iam_role" "partner_db_access" {
  name = "partner-xyz-database-readonly"

  assume_role_policy = jsonencode({
    Version = "2012-10-17"
    Statement = [{
      Effect = "Allow"
      Principal = {
        AWS = "arn:aws:iam::PARTNER_ACCOUNT_ID:role/their-app-role"
      }
      Action = "sts:AssumeRole"
      Condition = {
        StringEquals = {
          "sts:ExternalId" = "unique-secret-external-id-xyz123"
        }
      }
    }]
  })
}

resource "aws_iam_role_policy" "partner_rds_connect" {
  role = aws_iam_role.partner_db_access.id
  policy = jsonencode({
    Version = "2012-10-17"
    Statement = [{
      Effect   = "Allow"
      Action   = "rds-db:connect"
      Resource = "arn:aws:rds-db:eu-central-1:YOUR_ACCOUNT:dbuser:DB_RESOURCE_ID/partner_readonly"
    }]
  })
}
Key security features:
- External ID — prevents the “confused deputy” attack (another customer of the same vendor can’t trick them into accessing your account)
- Temporary credentials — STS tokens expire (1 hour default). No long-lived passwords
- Scoped to specific DB user —
partner_readonlyhas SELECT-only permissions on specific tables - CloudTrail audit — every AssumeRole call is logged
When to Use
- Partner is already on AWS
- You want zero long-lived credentials exchanged
- Fine-grained, auditable access
- Can be combined with PrivateLink for network-level isolation
What to Add on TOP of Any Method (Always)
Regardless of which method you choose, always layer these controls:
| Control | Why |
|---|---|
| Enforce TLS/SSL on database connections | Encrypt data in transit even on private networks |
| Least-privilege database user | Partner gets SELECT on specific tables, not GRANT ALL |
| Audit logging | Enable RDS audit logs — know what they queried and when |
| Credential rotation | If using passwords: Secrets Manager with 30-day auto-rotation |
| VPC Flow Logs | Monitor the network traffic — detect unusual patterns |
| Access review schedule | Revisit third-party access quarterly. Revoke if no longer needed |
| NACLs as extra layer | Subnet-level deny rules as defence in depth |
Decision Flowchart
Does the partner need database access?
    │
    ├── Is the data sensitive (PII, payments)?
    │    │
    │    YES → Use PrivateLink (Option 3) or VPN (Option 2)
    │    │
    │    NO → IP Whitelist (Option 1) may be acceptable for non-sensitive reads
    │
    ├── Is the partner on AWS?
    │    │
    │    YES → PrivateLink (Option 3) + IAM Role (Option 5) = best combination
    │    │
    │    NO → Site-to-Site VPN (Option 2) or Direct Connect (Option 4)
    │
    ├── Is this a long-term integration?
    │    │
    │    YES → PrivateLink or VPN (invest in proper setup)
    │    │
    │    NO → IP Whitelist with TLS (temporary, quick)
    │
    └── Is high bandwidth needed (50+ GB/day)?
         │
         YES → Direct Connect (Option 4)
         │
         NO → VPN or PrivateLink
Summary: Ranked by Security
| Rank | Method | Security | Effort | Monthly Cost |
|---|---|---|---|---|
| 1 (Best) | PrivateLink + RDS Proxy | No internet, provider-controlled | High initial, low ongoing | ~$25 (NLB + processing) |
| 2 | Site-to-Site VPN | Encrypted tunnel, no internet | Medium | ~$36 |
| 3 | Direct Connect | Private fibre, no internet | High (physical setup) | $220+ |
| 4 | Cross-Account IAM Role | Temp credentials, no passwords | Medium | Free |
| 5 (Basic) | IP Whitelist + TLS | Internet exposure (encrypted) | Low | Free |
Key Takeaway
“I would never recommend keeping the database in a public subnet. Move it to a private subnet and expose it via AWS PrivateLink with an NLB and RDS Proxy — traffic stays on AWS’s private network, never touches the internet. If PrivateLink isn’t feasible, a Site-to-Site VPN is the next best option. As a minimum, whitelist their static IP in the security group and enforce TLS — but that’s the least secure since traffic still crosses the internet. On top of any method: enforce least-privilege DB access, enable audit logging, rotate credentials, and review access quarterly.”
Questions about securing database access? Connect with me on LinkedIn.